Dickinson College Kline Athletic Center
The Dickinson College Kline Squash Courts and Fitness Center is a special project for a couple of reasons. The building was constructed using the Design Build delivery method, which allowed Smucker Company to be involved in the delivery of the design intent of the architect and owner. While this allows for great flexibility during construction, on this project it also created lots of challenges because of the innovative products being used and the complexity of the building design. However, the innovative products and complexity of the building are another reason that this project is special. We encountered many new and exciting products that the architect envisioned in his design and it was our task to bring that design vision to reality.
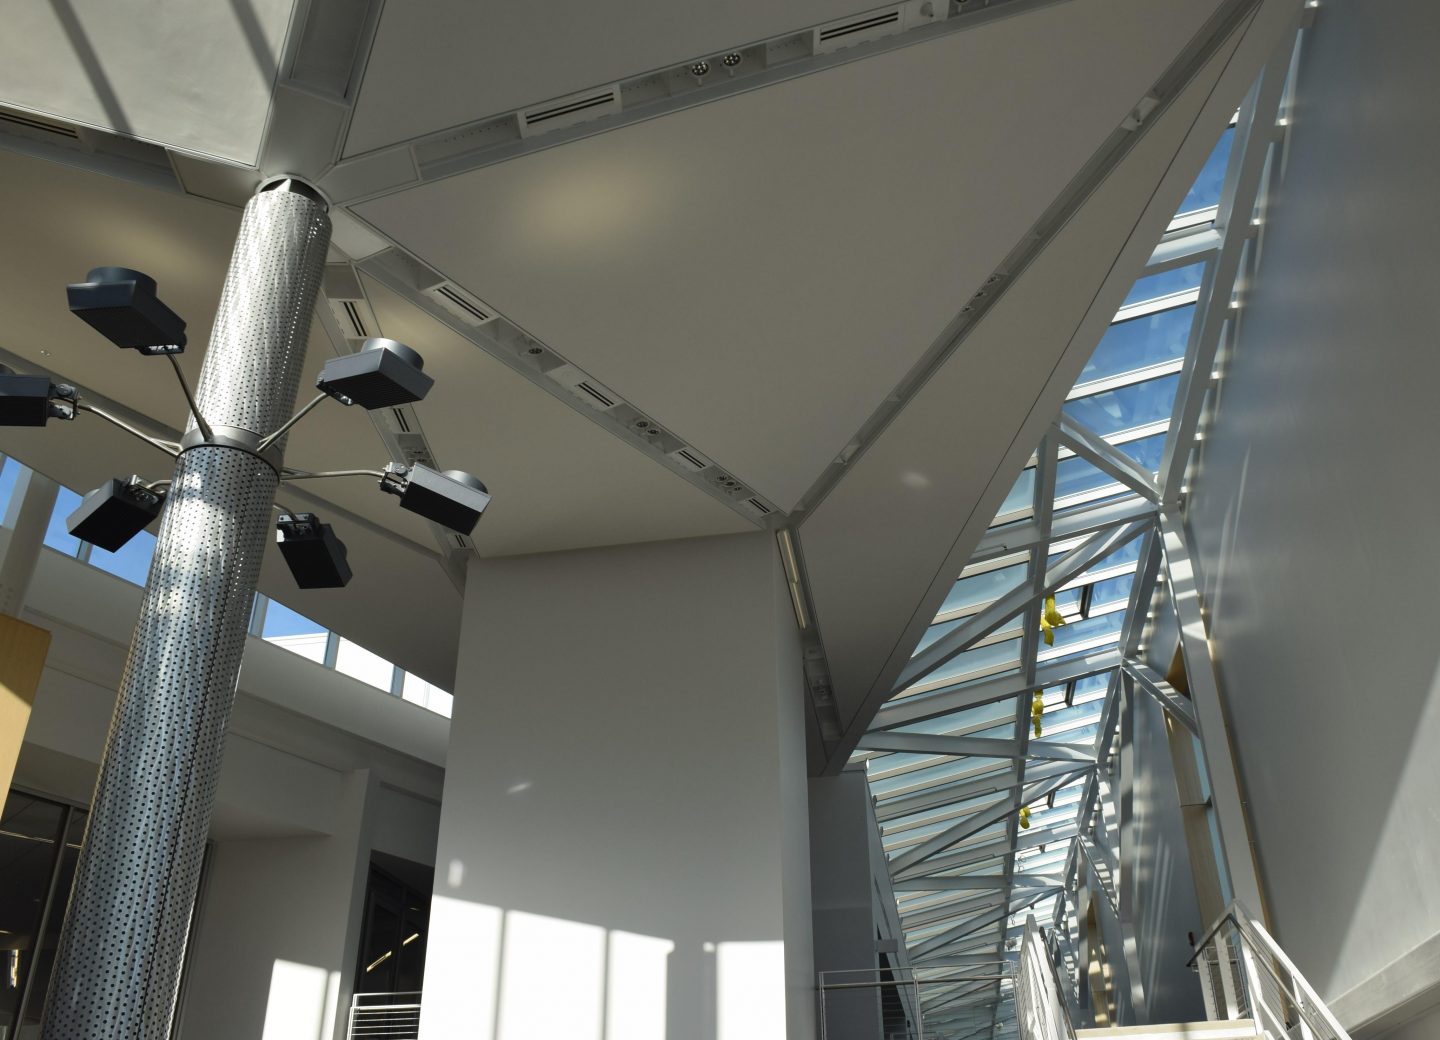
One area that uses an innovative product is the ceiling in the main entry area. The ceiling is a series of triangular sections of plaster sloped down from the walls to a lower center point defined by a decorative metal post that also serves as a light post to light the sloped ceiling above. The plaster for this ceiling isn’t just ordinary plaster that we all have seen for years in our trade. Instead it is a new, innovative acoustical plaster system called Starlite. The Starlite system is an imported system from Germany, so all the products had a long lead time that needed to be considered in the construction schedule. In addition, the high point of this ceiling was just under 30’, so a complex scaffolding structure was built to match the slope of the ceiling so that the plaster ceiling system could be installed in a safe and efficient manner.
- Client: Dickinson College Kline Athletic Center
- Project Type: Stadiums / Rec Centers

The construction procedure for the Starlite Plaster Ceiling called for a grid system hung from the building structure with hanger wires. The grid system was installed with the normal 2’ and 4’ on center cross tees. However, with this being an imported system, all the Starlite panels (which would be similar to our gypsum product) were in metric measurements. This meant that none of the cross tees matched the butt joints of the Starlite panels and therefore a lot of extra 2’ and 4’ cross tees needed to be added so we could have adequate attachment points for the panels. During installation of the panels, an acoustical spackle needed to be applied to all the butt joints. After all the panels were installed, mesh tape was applied to all the joints and then a coating of the acoustical spackle was applied over the mesh tape at all of the joints. After the spackle was properly cured, we then applied a smooth finish coat of Starlite Silent plaster and now it was ready for paint.
Also in the design of the plaster ceiling are recessed formed aluminum light troughs that were attached to a metal stud framework. These light troughs had a reveal lip that butted into the finished plaster ceiling. The end result is a beautiful plaster ceiling with incredible lighting features.
Another innovative product used on this project was the 15 GRG skylight tubes. The GRG is not innovative and we have worked with this product many times on previous projects. The innovation was the design vision that the architect had for this GRG product. The skylight tubes are about 6’ tall and came in 32 individual pieces of GRG. The 32 pieces were designed to fit together and create a round tube that extends through the roof to create a skylight tube.
There were many challenges with these skylight tubes. Each location for the 15 tubes was unique and created the need for us to “custom-fit” each tube for its location. The most extreme “custom-fit” location was installing one of the tubes where 3 steel I-beams intersected. For all the other 14 locations, we were able to assemble the skylight tube on the ground and then hoist it in place using a winch and ropes. We setup our winch on the roof and then brought the ropes down through the hole in the roof that the skylight tube was going to fit in. After careful maneuvering, the skylight tube would be raised up slowly and carefully (in some cases as much as 30’ above the floor) until the upper part of the tube extended up above the roof. The roofer then installed a roof cap and sealed the edges to make it water tight at the roof level.
Back to the skylight tube that we were forced to install around the intersection of the 3 steel I-beams. In this case, one of our very experienced carpenters spent a couple of weeks taking each of the 32 individual pieces and custom fit (built in place) the entire skylight tube.
After the assembly of each tube, we also needed to use mesh tape, spackle and sand each tube on the inside and the outside of the tube. This was done so that they were paint ready. When we discovered that the paint was going to be a bright red, we then went back over the 15 skylight tubes and applied a skim coat of spackle just to make sure they would look perfect after they were painted. Again, the end result is a design feature that looks incredible and the uniqueness of the design creates a Wow factor for the skylight tubes.
Another noteworthy item for our scope in this project is all the different reveal beads and trims that we used throughout the building. Some of these items were designed as we went along because the design team decided that it would add to the design of the project. We designed, fabricated and installed a metal light trough enclosure for all the strip lighting that was attached to the exposed steel beams. This was complicated even more by the fact that the lighting was already installed when we installed our light trough enclosure. Therefore, our enclosure was designed in two pieces so that we could work around the strip lighting. There are also hundreds of feet of zip beads along the Epic Deck, Fry Reglet reveal bead in the drywall ceiling under the mezzanine, Pittcon knife-edge 45 degree angle reveal molding along drywall soffits and custom made aluminum bent angle at various locations and in various shapes.
There were additional challenges created where the new addition attached to the existing building. We worked closely with the design team to create solutions for our metal framing and drywall installation. In one such location, the challenge was to transition from an existing cone-shaped roof structure into new, straight walls that needed to be drywalled and painted.
Our employees also installed all of the acoustical ceiling grid and tile throughout the building. This included the exterior linear metal ceiling, which comes in a “kit” from the manufacturer, meant to be all inclusive and simply snap together. With the exterior location of this ceiling, we needed to add stiffeners to allow for wind. These stiffeners had to be designed at exact locations so the ceiling would stay in place.
I will conclude by saying that our team is thrilled to have been a part of the construction of this building. The experience that we gained by being involved with so many innovative products will make us a stronger team in the future. Being able to create solutions “on the fly” will make us more useful on the next design build project. And most of all, the building turned out beautiful and the students now have an additional area to call home and hopefully this new building will enhance the squash program at Dickinson College.